
The night sky holds infinite wonders waiting to be captured, and wide-field deep-sky mosaics reveal cosmic landscapes that single-frame astrophotography simply cannot match.
🌌 The Mesmerizing World of Wide-Field Astrophotography
When we gaze upward on a clear, dark night, we’re witnessing only a fraction of the celestial masterpiece that surrounds us. Wide-field deep-sky imaging opens a window into the universe’s grandest structures—vast nebulae stretching across dozens of light-years, intricate dust lanes weaving through stellar nurseries, and galactic neighbors floating in the cosmic ocean. These sweeping vistas capture not just isolated objects, but entire regions of space that tell stories of stellar birth, evolution, and the majestic architecture of our galaxy.
Traditional astrophotography focuses on individual targets—a single nebula, galaxy, or star cluster. While these images are undeniably beautiful, they represent only small patches of sky. Wide-field imaging expands our perspective, revealing how cosmic structures connect and interact within their celestial neighborhoods. This approach transforms our understanding of deep-sky objects from isolated specimens into participants in a grand cosmic tapestry.
Why Mosaics Transform Deep-Sky Imaging
Mosaic imaging represents a quantum leap in astrophotographic capability. By capturing multiple overlapping frames and seamlessly stitching them together, photographers can create panoramic views that rival or exceed what our largest telescope fields can capture in a single exposure. This technique bridges the gap between what we see with our eyes and the detailed reality that exists beyond human perception.
The mathematics behind mosaics are elegant: instead of being limited by your telescope’s field of view, you can expand coverage indefinitely. A setup that captures 2 degrees of sky can be used to image 10, 20, or even 50 degrees by creating a mosaic panel arrangement. Each panel is individually processed and then combined using specialized software that aligns stars, matches brightness levels, and blends edges for seamless integration.
Technical Advantages That Matter
Beyond simple coverage expansion, mosaics offer several technical benefits that improve image quality. First, edge distortion—a common issue in wide-field optics—becomes less problematic since you’re primarily using the central, sharpest portion of your optical system for each panel. Second, you can achieve higher resolution across a wider area than would be possible with a single frame, combining the detail-gathering power of longer focal lengths with the coverage of wide-field systems.
Mosaics also provide flexibility in post-processing. Individual panels can be processed differently to handle varying sky conditions, gradient issues, or brightness differences across the field. This granular control enables superior final results compared to wrestling with these challenges in a single massive frame.
🔭 Essential Equipment for Wide-Field Mosaic Success
Creating stunning wide-field mosaics doesn’t necessarily require the most expensive equipment, but understanding what gear serves this purpose best will save countless hours of frustration. The key is matching your equipment to your imaging goals while maintaining quality standards that allow for successful panel integration.
Your telescope or camera lens serves as the foundation. For true wide-field work, focal lengths between 200mm and 600mm provide an excellent balance between coverage and detail. Shorter focal lengths capture more sky per frame, reducing the number of panels needed, while longer focal lengths reveal finer details within the mosaic. Refractors and apochromatic doublet or triplet designs excel here due to their flat fields and minimal optical aberrations.
Camera Selection and Sensor Considerations
Modern CMOS sensors have revolutionized astrophotography, offering low noise, high quantum efficiency, and excellent dynamic range. Dedicated astronomy cameras with cooling systems maintain consistent sensor temperatures across long imaging sessions—critical when capturing mosaic panels over multiple nights. Full-frame sensors maximize field coverage, though crop sensors work perfectly well and may actually benefit your project by requiring fewer panels while maintaining resolution.
Mount stability cannot be overstated. Your equatorial mount must track accurately for the duration of your exposures, typically several minutes each. For mosaics spanning multiple nights, precise return-to-position capability becomes essential. Modern mounts with GOTO functionality and plate-solving can automatically position each panel with remarkable accuracy.
Planning Your Cosmic Canvas 🎨
Successful mosaics begin long before you step outside with your equipment. Planning determines panel layout, overlap percentages, total integration time, and realistic completion timelines. Software tools have made this process dramatically more accessible, allowing you to visualize your mosaic before capturing a single photon.
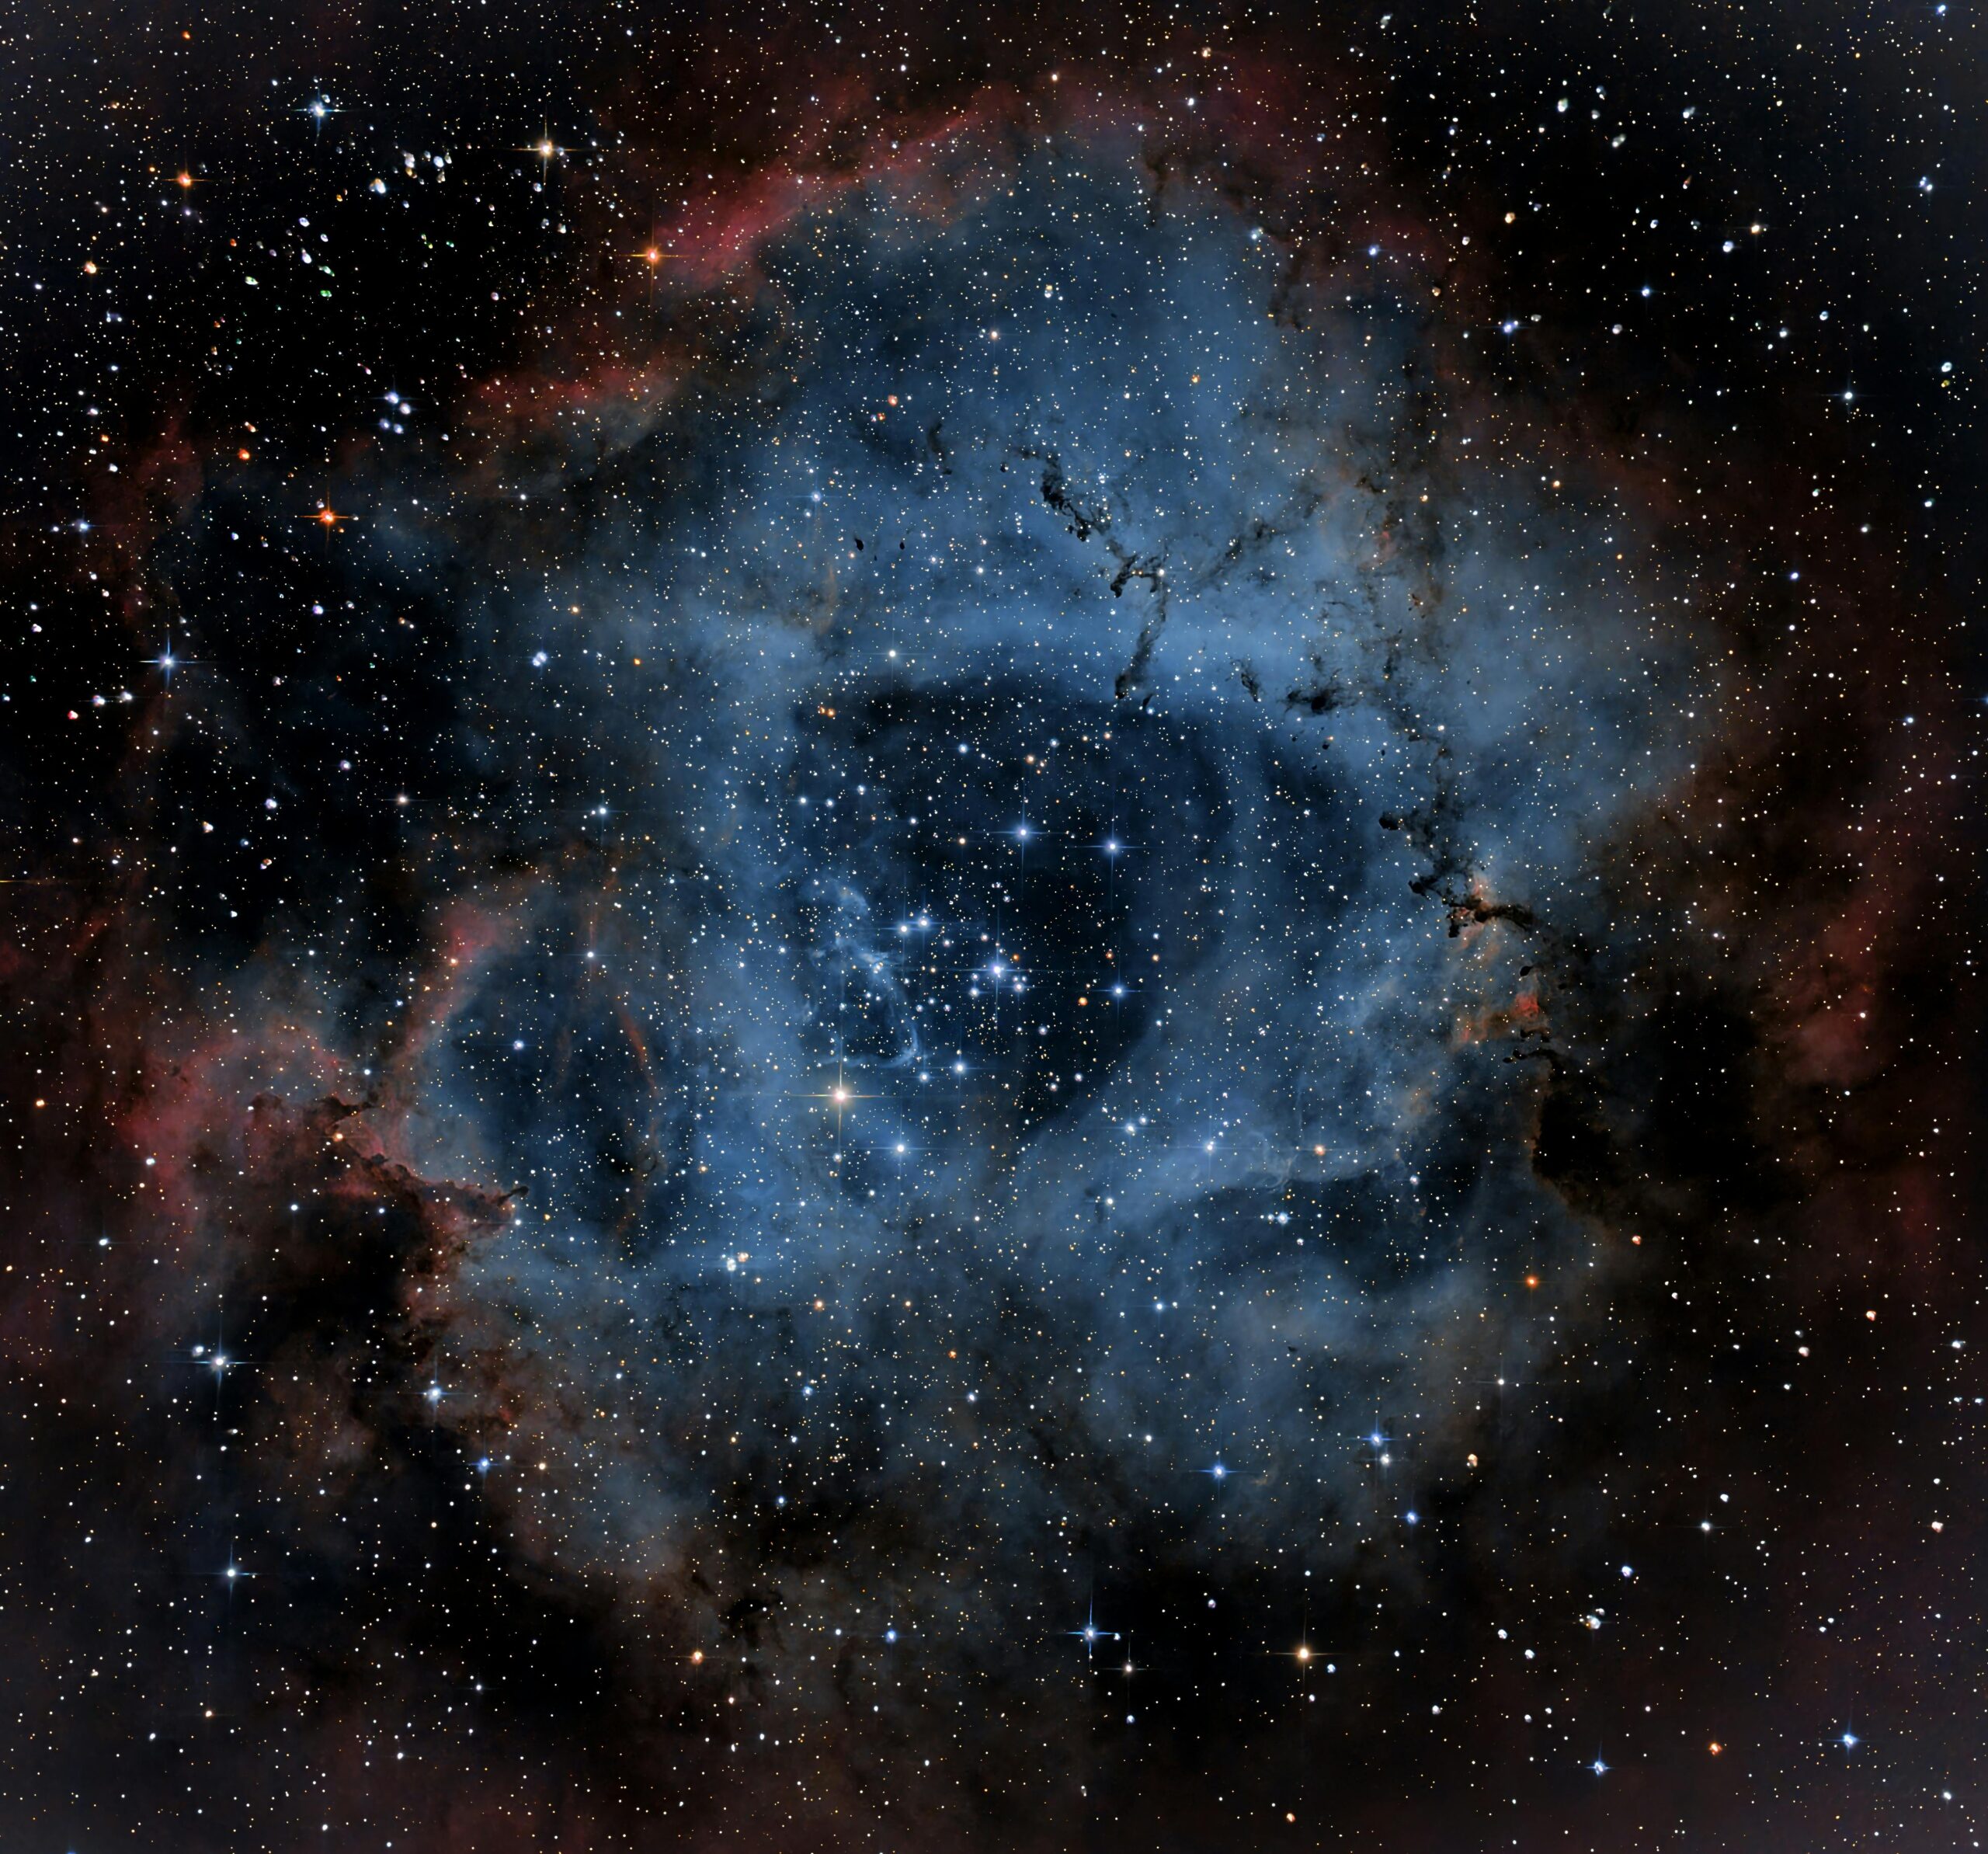
Start by selecting your target region. Popular choices include the Orion-Eridanus molecular cloud complex, the Cygnus region with its emission nebulae and dark dust lanes, or the Rho Ophiuchi cloud complex with its colorful reflection nebulae. Consider what makes a region interesting: Is it vast structures that benefit from wide-field treatment? Multiple interacting objects? Rich star fields with embedded nebulosity?
The Mathematics of Overlap
Panel overlap typically ranges from 20% to 40%. Too little overlap creates stitching challenges, while excessive overlap wastes imaging time without proportional benefits. A 30% overlap provides enough common stars for accurate alignment while maintaining efficiency. For a rectangular mosaic covering 10 degrees of sky with a 2-degree field of view per panel and 30% overlap, you’ll need approximately 25-30 panels arranged in a 5×5 or 6×5 grid.
Calculate your total integration time realistically. If each panel requires 3 hours of exposure for adequate signal-to-noise ratio, and you’re creating a 30-panel mosaic, that’s 90 hours of clear skies—potentially spanning months depending on your location and weather patterns. This long-term commitment makes project planning essential for maintaining motivation and achieving completion.
Capturing the Light: Imaging Strategy
On imaging night, preparation and systematic execution determine success. Begin by accurately polar-aligning your mount—precision here pays dividends throughout the session. Even slight polar alignment errors accumulate during long exposures and across multiple panels, potentially causing rotation between frames that complicates stacking and integration.
Frame and focus on a representative panel, typically near your mosaic’s center. Achieving critical focus is paramount; any focus shift between panels will be glaringly obvious in the final mosaic. Many imagers use electronic focusing systems with temperature compensation to maintain focus as night progresses and equipment cools.
Exposure Strategy for Consistency
Consistency across panels is crucial. Use identical exposure times, gain settings, and camera temperatures for all panels. Even minor variations in camera settings can create brightness or color mismatches that require extensive correction during post-processing. Most imagers capture between 2-5 hours per panel, broken into individual sub-exposures of 3-10 minutes each.
Don’t neglect calibration frames. Flat frames are particularly critical for mosaics, as vignetting and dust shadows that might be acceptable in single-frame images become problematic when stitching panels. Capture flats for each imaging session, and consider creating master calibration libraries for your equipment configuration.
🖥️ Post-Processing: Where Magic Happens
With your imaging data collected, post-processing transforms raw frames into a cohesive whole. This stage demands patience, attention to detail, and often significant computing resources. Modern mosaic projects can involve hundreds of gigabytes of data, so ensure your system has adequate RAM, storage, and processing power.
Begin by processing each panel individually. Calibrate with your dark, flat, and bias frames, then stack the sub-exposures for each panel. This creates your panel masters—the individual pieces you’ll eventually combine. At this stage, perform basic stretching and background extraction on each panel, but avoid aggressive processing that might complicate integration later.
Stitching Software and Techniques
Several software packages excel at mosaic integration. PixInsight’s GradientMergeMosaic and MosaicByCoordinates tools offer professional-grade results with fine control over blending and distortion correction. Microsoft ICE (Image Composite Editor) provides remarkably good results with minimal user input, making it ideal for beginners. Photoshop’s Photomerge function works well for smaller mosaics with good overlap.
The stitching process aligns panels using star patterns, matches brightness and color across seams, and blends edges for seamless transitions. Pay special attention to regions where panels meet—visible seams indicate problems with flat frames, inconsistent processing between panels, or inadequate overlap.
Overcoming Common Mosaic Challenges
Even carefully planned mosaics encounter obstacles. Sky gradients—brightness variations caused by light pollution, moonlight, or airglow—rank among the most common issues. These gradients often vary between panels captured on different nights or from different sky positions, creating obvious mismatches.
Address gradients before stitching by using gradient removal tools on individual panels. Dynamic Background Extraction in PixInsight or gradient removal in other software can neutralize these variations. Alternatively, some imagers prefer to combine panels first, then address gradients in the completed mosaic, though this requires more sophisticated techniques.
Managing Color and Brightness Variations
Color consistency across panels challenges even experienced imagers. Atmospheric conditions, varying target altitude during capture, and even slight focus changes can shift color balance between panels. Create a color reference by measuring neutral star colors across your mosaic, then adjust panels to match this reference before final integration.
Brightness matching requires similar attention. Capture sky background measurements from each panel and normalize them during preprocessing. Some variations will remain—perfectly acceptable since real sky brightness does vary—but obvious steps or discontinuities must be corrected for professional results.
🌠 Showcasing Iconic Wide-Field Targets
Certain regions of sky practically demand mosaic treatment, offering spectacular results that justify the substantial time investment. The Orion-Eridanus superbubble spans over 40 degrees, encompassing the Orion Nebula, Horsehead Nebula, Barnard’s Loop, and the vast Eridanus molecular cloud. A complete mosaic reveals how these structures connect, showing the enormous scale of stellar feedback shaping this region.
The Cygnus constellation offers another prime target, with the North America Nebula, Pelican Nebula, Veil Nebula complex, and countless dark nebulae creating a rich tapestry of cosmic structures. A wide-field mosaic here captures the interplay between emission, reflection, and dark nebulae that defines this region’s character.
The Galactic Center and Beyond
For Southern Hemisphere observers, the Galactic Center region presents an unparalleled mosaic opportunity. Capturing from Sagittarius through Scorpius reveals the densest star fields visible from Earth, studded with nebulae, star clusters, and dark dust lanes. The scale and complexity of this region rewards mosaic treatment with images that convey the majesty of our galaxy’s heart.
Don’t overlook less traditional targets. The Andromeda Galaxy benefits enormously from mosaic treatment, allowing you to capture not just the galaxy itself but its companion galaxies and the full extent of its stellar halo. Even relatively “empty” regions between major objects often reveal previously unnoticed faint nebulosity and galactic cirrus when given the integration time a mosaic project demands.
Advanced Techniques for Ambitious Imagers
Once you’ve mastered basic mosaic creation, advanced techniques can elevate your work to new levels. Multi-scale mosaic processing combines different resolution data—using longer focal length images for detailed core regions while surrounding them with wider field context. This approach creates images that satisfy both the desire for sweeping vistas and the appreciation for fine detail.
Narrowband mosaics introduce additional complexity but reward with stunning results. Capturing each panel through hydrogen-alpha, oxygen-III, and sulfur-II filters reveals emission structures invisible to broadband imaging. The Hubble Palette—mapping these narrowband channels to red, green, and blue—creates the dramatic false-color images familiar from professional observatory releases.
Time-Lapse Mosaic Animation
For the truly ambitious, creating time-lapse sequences of your mosaic construction process makes for compelling content. Recording progress as panels accumulate, showing the gradual revelation of the full scene, demonstrates the dedication required while creating visually engaging documentation of your project.
The Future of Wide-Field Astrophotography 🚀
Technology continues advancing, making wide-field mosaics increasingly accessible. Larger format sensors reduce panel counts, while improved mount accuracy simplifies precise positioning. Artificial intelligence and machine learning algorithms now assist with panel alignment, gradient removal, and seamless blending—tasks that once required manual intervention.
Cloud-based processing may soon handle the computational burden of large mosaics, allowing imagers to upload their data and receive professionally processed results without investing in high-end computers. Collaborative mosaic projects—where multiple imagers contribute panels covering different regions—could create unprecedented wide-field views combining the efforts of amateur astronomers worldwide.
The democratization of equipment means that creating museum-quality wide-field mosaics no longer requires institutional resources. Amateur astrophotographers regularly produce images rivaling or exceeding professional observatory work from decades past, revealing cosmic beauty in unprecedented detail and scale.
Sharing Your Cosmic Vision With the World
Completing a major mosaic project deserves celebration and sharing. Online astronomy communities like AstroBin, Cloudy Nights, and various social media platforms provide venues for showcasing your work and connecting with fellow imagers. Detailed acquisition and processing notes help others learn from your experience while documenting your technical approach.
Consider printing your mosaics at large scale. These images were designed for grand presentation, and seeing your work printed at 40 inches or larger creates an impact impossible to achieve on-screen. Many imagers display their mosaic projects as centerpieces in home observatories or donate prints to schools and planetariums for educational purposes.
The journey from planning your first mosaic to viewing the completed image represents a significant achievement in astrophotography. You’ve combined technical skill, artistic vision, patience, and dedication to reveal cosmic structures in ways few humans ever experience. Each mosaic becomes not just an image but a testament to the beauty accessible when we commit to unveiling the universe in all its wide-field glory.
Whether you’re capturing the vast molecular clouds of our galaxy, the intricate structure of nearby nebulae, or the sweeping star fields that define our night sky, wide-field mosaics transform astrophotography from documentation into exploration. They remind us that the universe reveals its deepest beauty not in isolated moments but in the grand connections between cosmic structures—connections that only patient observation and careful craft can fully reveal. The night sky awaits your vision, ready to be assembled one panel at a time into a masterpiece that captures infinity itself.


